


Listen to this article
Installing a thermostat can seem daunting, but with the right materials and guidance, you can tackle this project quickly and confidently. A thermostat plays a vital role in controlling the temperature of your home, making it a critical component for heating and cooling systems. In this guide, we’ll walk you through the steps to wire your thermostat, ensuring that you understand how to replace, connect, and mount it effectively.
- Always turn off power at the circuit breaker before disconnecting or wiring the thermostat to prevent electrical shock and equipment damage.
- Label or photograph existing wire connections and match colored wires to correct terminals when installing the new thermostat.
- Gather necessary tools and follow manufacturer instructions; test system after powering on and consult a pro if problems persist.
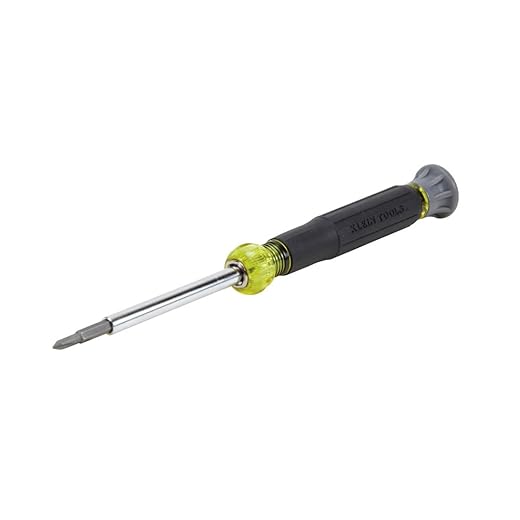
Before you start, it’s essential to gather all the necessary materials and tools. Typically, you will need a pencil for marking connections, a screwdriver for mounting, and possibly an adapter if you’re working with different types of systems. The bottom line is to be well-prepared; this will help you avoid any potential complications as you wire your new device. Most manufacturers provide specific instructions, so it’s a good idea to reference them as well.

Throughout this guide, we will highlight three crucial phases: removing your old thermostat, connecting the new wiring, and efficiently mounting the new unit. You’ll also find various options for controlling your heating and cooling systems, including smart technology like Nest and Cync. By the end of this article, you will have insights into how to display the settings and adjust the system based on your preferences, ensuring that your home remains comfortable year-round. So, let’s dive in and learn how to turn your thermostat wiring into a straightforward process!
Preparing for Installation
Before diving into your thermostat installation, it’s essential to gather all the necessary tools and materials. Ensure you have a pencil handy for marking positions, a level to guarantee everything is straight, and a screwdriver for removing the old thermostat. If you’re a newcomer to the DIY world, don’t worry. You’ll be surprised how straightforward it can be, especially with products like the Ecobee Smart Thermostat, which simplifies the process and connects seamlessly to your smartphone.
First, turn off the power to your heating and cooling unit. This is a crucial safety step to avoid any electrical trouble. Once you’ve done that, you can start by removing the cover from the old thermostat. Pay attention to where the wires connect to the terminal. Usually, they will be labeled, which helps in easily locating the right connections for your new model.
Now, let’s talk about the backplate. When you’re ready to install your new unit, make sure to hold it level and secure it to the wall. Double-check the position so that it sits comfortably at a height that allows for optimal temperature readings. Misalignment here could lead to incorrect temperature settings and, ultimately, higher energy bills. After securing the backplate, carefully connect the wires to the corresponding terminals on your new product.
As you install the new thermometer, it’s a good idea to keep in mind the potential savings in energy costs. With a smart model like the Ecobee, you can manage your home’s heating and cooling from anywhere, ensuring your comfort while saving on your electrical bill. Once everything is connected, please turn the power back on and click through to set your desired temperature.
Finally, if you’re located in Oregon or any area with seasonal temperature changes, knowing your heater’s capabilities can be crucial. Make sure your unit is fully operational and working efficiently. If you still have questions about certain products, don’t hesitate to consult the user manual or reach out to the manufacturer for guidance. Happy installing!
Gathering Necessary Tools and Materials
Before diving into wiring your thermostat, it’s essential to gather all the necessary tools and materials. This preparation will ensure a smooth installation process, especially for newcomers. You won’t want to find yourself scrambling for tools midway through, so let’s identify what you’ll need. A good starting point is a quality screwdriver set, as you’ll likely need it for securing screws to mount your new thermostat. Consider getting a multibit screwdriver, which can adjust to various screws, making your job easier.
Along with the screwdriver, having a pencil is crucial for marking the holes on the walls. This will ensure that everything is aligned perfectly when mounting the thermostat. You should also consider having wire labels or tape ready. Proper labelling is essential for identifying the terminals on your thermostat and ensuring that everything is connected correctly. This will help you manage the electrical systems without trouble later on.
If your new thermostat is a smart WiFi product, make sure your local network is ready for connection. Check that your WiFi is functioning well within your home’s interior, especially if the thermostat will control your heating or cooling systems based on schedules. If you’re adjusting a water heater or similar system, verify that it follows local regulations and meets the efficiency standards you’d expect from a professional installation.
Lastly, consider a jumper wire, as it might come in handy during the installation process, particularly if you run into unique configurations. Products like the Nest Learning Thermostat or Ecobee SmartThermostat available on Amazon could offer excellent options for better temperature controls and efficiency. Remember, taking these preliminary steps will make your project straightforward, so that you can focus on enjoying your new thermostat.
Understanding Your Current Wiring
When it comes to wiring your thermostat, it’s essential to understand the current wiring setup in your home. Most thermostats operate using low-voltage systems, which are typically safer and easier to manage than high-voltage ones. You will usually find a gangbox where the wires are connected, so please locate this part before you begin your project.

For an example, many modern systems have a variety of wires, such as red (R), green (G), yellow (Y), and white (W). Each of these wires has a specific function, such as powering the heater or managing the cooling system. By understanding which wire corresponds to which function, you can easily remove and replace your old thermostat with a new one, like the Nest Learning Thermostat, which allows for geofencing and energy-efficient schedules.
Using experts’ advice, you can make the right choices based on your specific requirements. For high-efficiency devices, it’s important to ensure that everything is connected properly. During the installation stage, you may need to manage electrical contacts by unscrewing and rearranging them onto the correct terminals. This process can seem daunting, but usually, it’s quite straightforward if you follow the provided instructions closely.
In-depth wiring knowledge becomes particularly useful if you’re planning to install additional systems, such as pumps for a heated floor. Remember to keep in mind the overall flow of electricity to avoid any damage. When everything is done, you’ll have a setup that functions efficiently, keeping your home comfortable, and you’ll have the added benefit of controlling it remotely, enhancing your experience as a customer.
Safety Precautions Before Starting
Before you begin wiring your thermostat, it’s essential to take some safety precautions to ensure the process goes smoothly and prevents any issues. Newcomers to DIY projects may not realize the importance of protecting themselves and their property. Always start by turning off the power at the circuit breaker panel to avoid any accidental electric shocks. This can typically be found under the labeled circuit breakers and should be clearly marked. If you’re unsure, consider consulting an electrician.
Next, gather the necessary tools and materials. You will need a screwdriver, wire stripper, and possibly some fishing tape if your wires are tucked away in tight spots. It’s a good idea to have a video tutorial on hand to follow along step-by-step. If you’re using a smart thermostat, such as a Nest or Cync model, ensure you’ve reviewed the specific features and instructions provided by the manufacturer. This will help you understand how the new unit connects to your existing system.
Make sure to fully locate the source of your heating and cooling systems. Before mounting the new thermostat, double-check that the wiring is correct and that there isn’t any trouble with the old unit. Sometimes, those wires could be wiggling or improperly connected, which could cause issues down the line. When wiring, it’s critical to make sure that every connection is made correctly, typically matching the corresponding colors–white for heat, for instance.
As you work, remember that your energy bill can be affected by how well your thermostat functions. Choosing the right unit can save you money in the long term. Depending on the interior of your home, you may also want to consider units that support wi-fi to allow for remote adjustments. Follow these precautions, and applying the tips from experts like Tyler will ensure that you complete the installation successfully and safely.
Once everything is connected properly, you can finally move on to testing the system. Turn the power back on and watch your thermostat come to life. If the system powers up and everything is functioning as expected, congratulations! You’ve successfully wired your thermostat yourself.
Disconnecting the Old Thermostat
When you’re ready to disconnect your old thermostat, the process can seem daunting, but it’s entirely manageable with the right approach. First, ensure your power is off to prevent any electrical mishaps. Most heating and cooling systems operate on 24VAC, so be cautious while handling any wires. Use a screwdriver to remove the thermostat from its mounting plate. It usually just requires unscrewing a couple of screws, which should take just a few minutes.
As you take off the unit, pay attention to the colored wires attached to the terminals. Generally, you will find a standard color coding system that includes red (power), white (heat), green (fan), and yellow (cooling). Take a photo of the setup before proceeding; this will help when you are pairing your new thermostat. Note which wire goes where because this will make the installation of the new unit significantly easier.
In some cases, you might find a gangbox behind your thermostat. This is a common spot where wires connect, and knowing how to maneuver in there is crucial. If the wires are tightly secured, you may need to apply a bit of force to lift them out. Don’t worry if it feels stiff; just ensure you’re being careful not to damage anything.
While you’re disconnecting, check for any additional components like sensors or remote control units. High-tech thermostats can have various features that rely on sensors, and knowing what you have will influence your new tech setup. Make a note of any special names associated with your old thermostat or features that you’d like to maintain with the new unit.
After detaching the old thermostat, you can move on to the installation of your new device. With brands like Cync or others available on Amazon, you’ll find plenty of examples that cater to your needs. Investing in a modern thermostat not only promises a comfortable home environment but also saves you money in energy bills over time. So, dive into the process with confidence–you’re just a few steps away from an upgraded heating and cooling experience!
Turning Off Power to the HVAC System
Before you begin wiring your thermostat, the first critical step is to turn off the power to your HVAC system. This precaution not only protects you from electrical shock but also ensures that you won’t accidentally damage the system during installation. Usually, you can find the switch located near the equipment, which controls all the electrical flow to your heating and cooling system. If you’re unsure about its location, finding a local technician or professional can offer you assistance.
To turn off the power, click the switch and double-check that the system is not running. You can also locate the circuit breaker in your electrical panel and switch it off. If your HVAC system operates on 24VAC, ensure that you cut the power to the correct circuit. In many homes, there may be up to four circuits dedicated to their HVAC, so it’s essential to target the right one. If you struggle to identify which switch impacts your HVAC, a quick reference guide can simplify the process.
After ensuring power is off, you’ll want to configure the placement of your thermostat carefully. Make sure you remove any old thermostat and prepare your new one. Many modern smart thermostats come with features like sensors for temperature control or backlit displays for easier navigation. When purchasing a new thermostat, consider options that pair well with your existing system. For example, the ecobee SmartThermostat, available on Amazon, is a great choice due to its compatibility and features.
Using a pencil to mark your settings on the current wiring can help simplify the process when you start to wire in your new thermostat. This simple effort will save you time and ensure everything goes smoothly. Finally, remember to turn the power back on after you’ve completed the installation and double-check your connections to feel confident about your work. Whether you’re experienced or a first-time DIYer, these steps will help you complete your thermostat installation correctly.
Questions and answers:
What tools do I need to wire my thermostat?
To wire your thermostat, you will need a few basic tools: a screwdriver set, wire strippers, a multimeter, and potentially a drill if you need to make new holes for mounting. Ensure you have a voltage tester on hand as well to verify that the power is off before starting any work.
Can I wire a thermostat myself, or should I hire a professional?
Wiring a thermostat can be a straightforward task for someone with basic electrical knowledge. If you feel comfortable working with electrical wiring and can follow instructions carefully, you can likely do it yourself. However, if you have any doubts about your abilities or if you are unfamiliar with electrical systems, hiring a professional is a safer option.
What are the common wires found in a thermostat installation?
In a typical thermostat installation, you will encounter several different wires, each serving a unique function. Common wire labels include R (power), W (heat), Y (cooling), G (fan), and C (common). The configurations may vary depending on your HVAC system, so it’s important to refer to your system’s manual or the wiring diagram specific to your thermostat.
What steps should I follow to configure my new thermostat?
To configure your new thermostat, first, turn off the power to the HVAC system at the circuit breaker. Next, remove the old thermostat and note where each wire is connected. Install the new thermostat according to the manufacturer’s instructions, connecting the wires to the correct terminals. Once everything is in place, turn the power back on and follow the setup prompts on the thermostat to configure your settings.
How can I troubleshoot issues if my thermostat is not working after installation?
If your thermostat is not working after installation, begin by checking that the power is still turned on at the circuit breaker. Verify that all wires are securely connected and that they match the appropriate terminals. You may also want to test the voltage with a multimeter. If everything appears correct, check the manufacturer’s troubleshooting guide, or consult a professional if you are unable to resolve the issue.


